Overview
Allow and Deny lists let you control how Ocean handles emails from specific senders. By adding domains, IP addresses, or specific sender email addresses to these lists, you can:- Allow List: Mark senders as trusted, reducing false positives for known safe sources
- Deny List: Mark senders as suspicious or malicious, ensuring emails from these sources are blocked
Changes to allow/deny lists take effect immediately for all new incoming emails.
Accessing Allow & Deny Lists
Navigate to Settings > Allow & Deny List in the Ocean portal to manage your lists.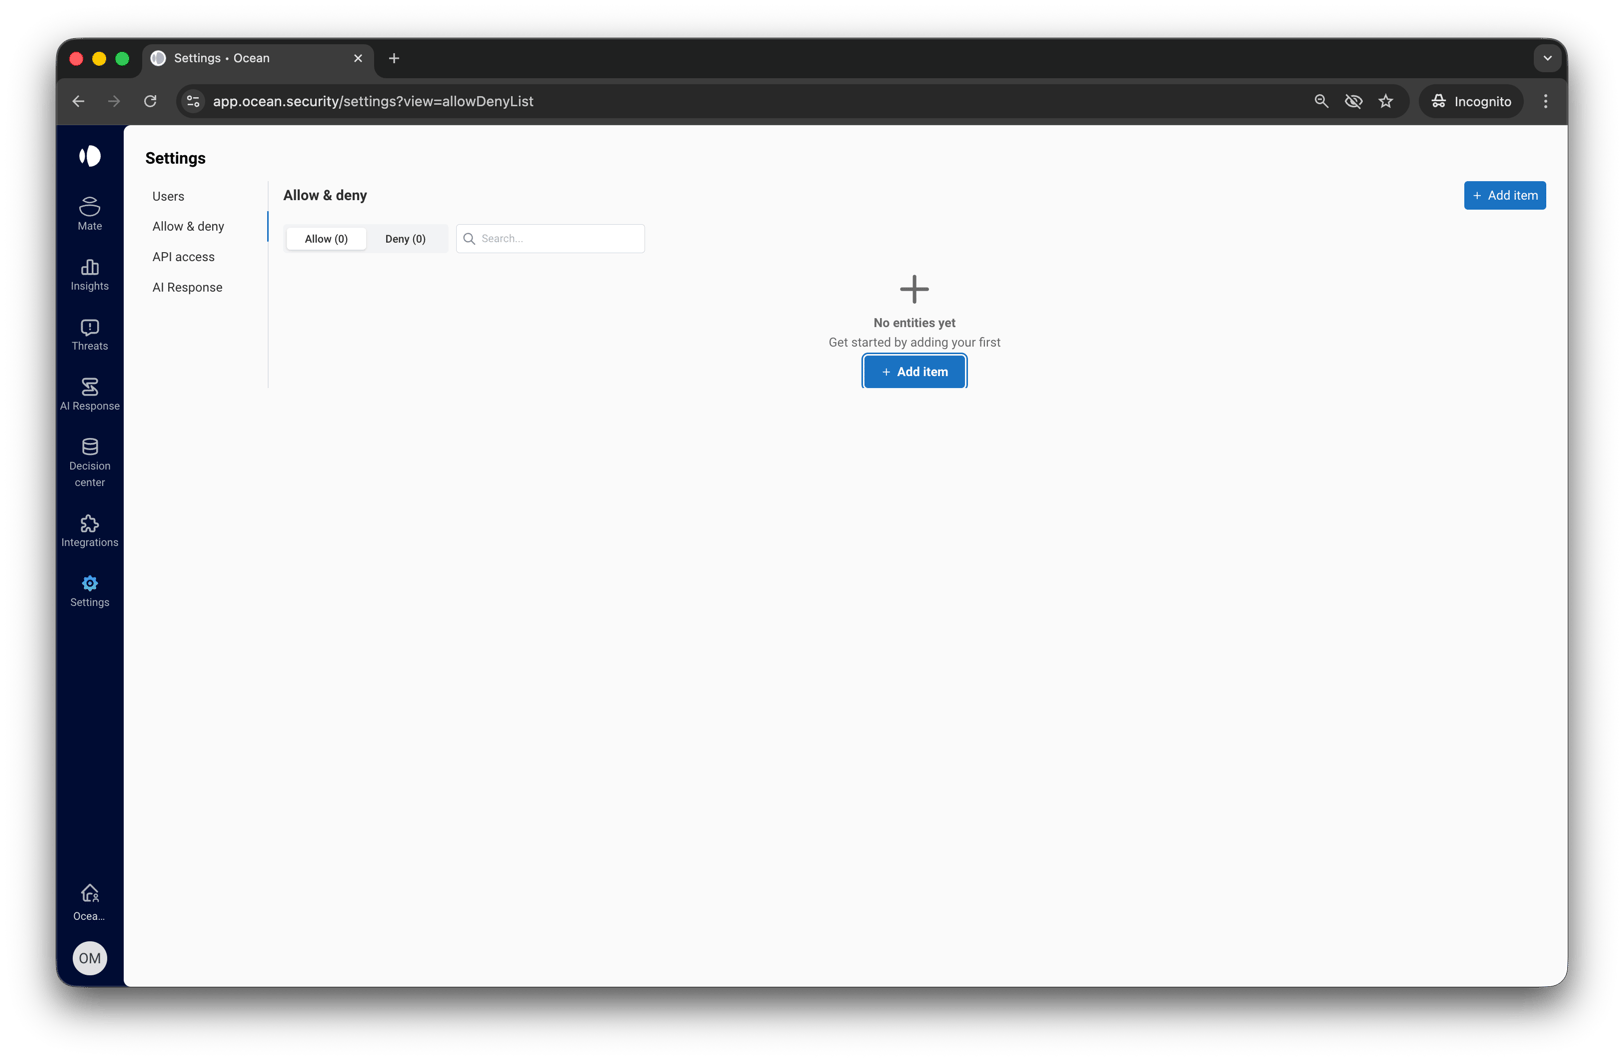
Understanding the Lists
Allow List
The Allow List contains domains, IP addresses, and email addresses that you trust. When an email arrives from a sender on your Allow List:- Ocean marks the email as allowed
- Reduces false positives from known partners, vendors, or services
Use the Allow List for trusted business partners, SaaS applications, legitimate services that may trigger false positives, or specific individuals whose emails should always be allowed.
Deny List
The Deny List contains domains, IP addresses, and email addresses you want to block. When an email arrives from a sender on your Deny List:- Ocean marks the email as denied
- Helps block known bad actors and mitigate associated risks
Entry Types
Ocean supports three types of entries for both Allow and Deny lists:Domain
Add a domain to apply the rule to all emails from that domain. Examples:example.com- Matches emails from anyone@example.compartner.co.uk- Matches emails from anyone@partner.co.uk
Subdomains are matched separately. Adding
example.com does not automatically include mail.example.com. Add each subdomain explicitly if needed.IP Address
Add an IP address or CIDR range to apply the rule based on the sender’s mail server IP. Examples:203.0.113.50- Matches a single IP address203.0.113.0/24- Matches all IPs from 203.0.113.0 to 203.0.113.255 (CIDR notation)
IP-based rules are useful for blocking or allowing entire mail server ranges, such as those from specific hosting providers or email services.
Email Address
Add a specific email address to apply the rule to emails from that exact sender. This provides more granular control than domain-based rules. Examples:support@example.com- Matches only emails from this specific addressnewsletter@marketing.io- Matches only emails from this specific newsletter sender
Use email address rules when you want to allow or deny a specific sender without affecting other users from the same domain. This is useful for allowing trusted contacts or blocking specific bad actors.
Email address rules take precedence over domain rules. If you allow
support@example.com but deny example.com, emails from support@example.com will still be allowed.Adding Entries
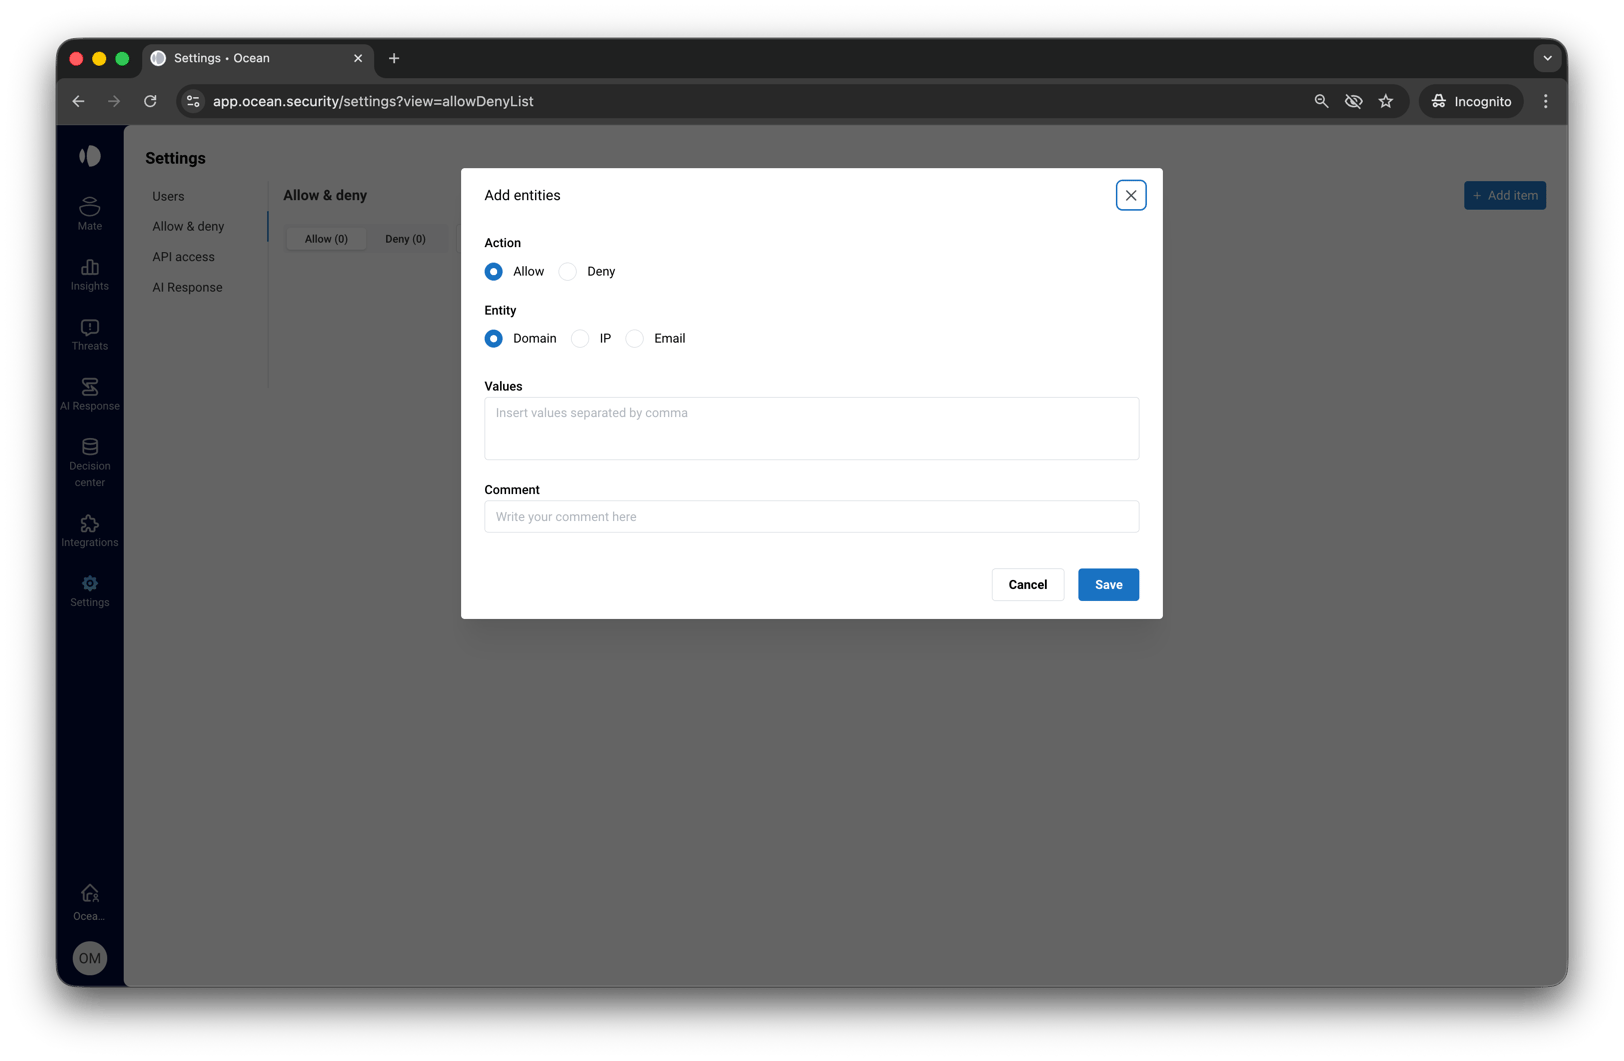
Select Entry Type
Choose the identifier type:
- Domain - For email domains
- IP - For IP addresses or CIDR ranges
- Email - For specific sender email addresses
Enter Values
Enter the domains, IP addresses, or email addresses you want to add. You can add multiple entries at once by separating them with commas.Example for domains:Example for IPs:Example for email addresses:
Add a Comment (Optional)
Add an optional comment to document why this entry was added. This helps your team understand the context later.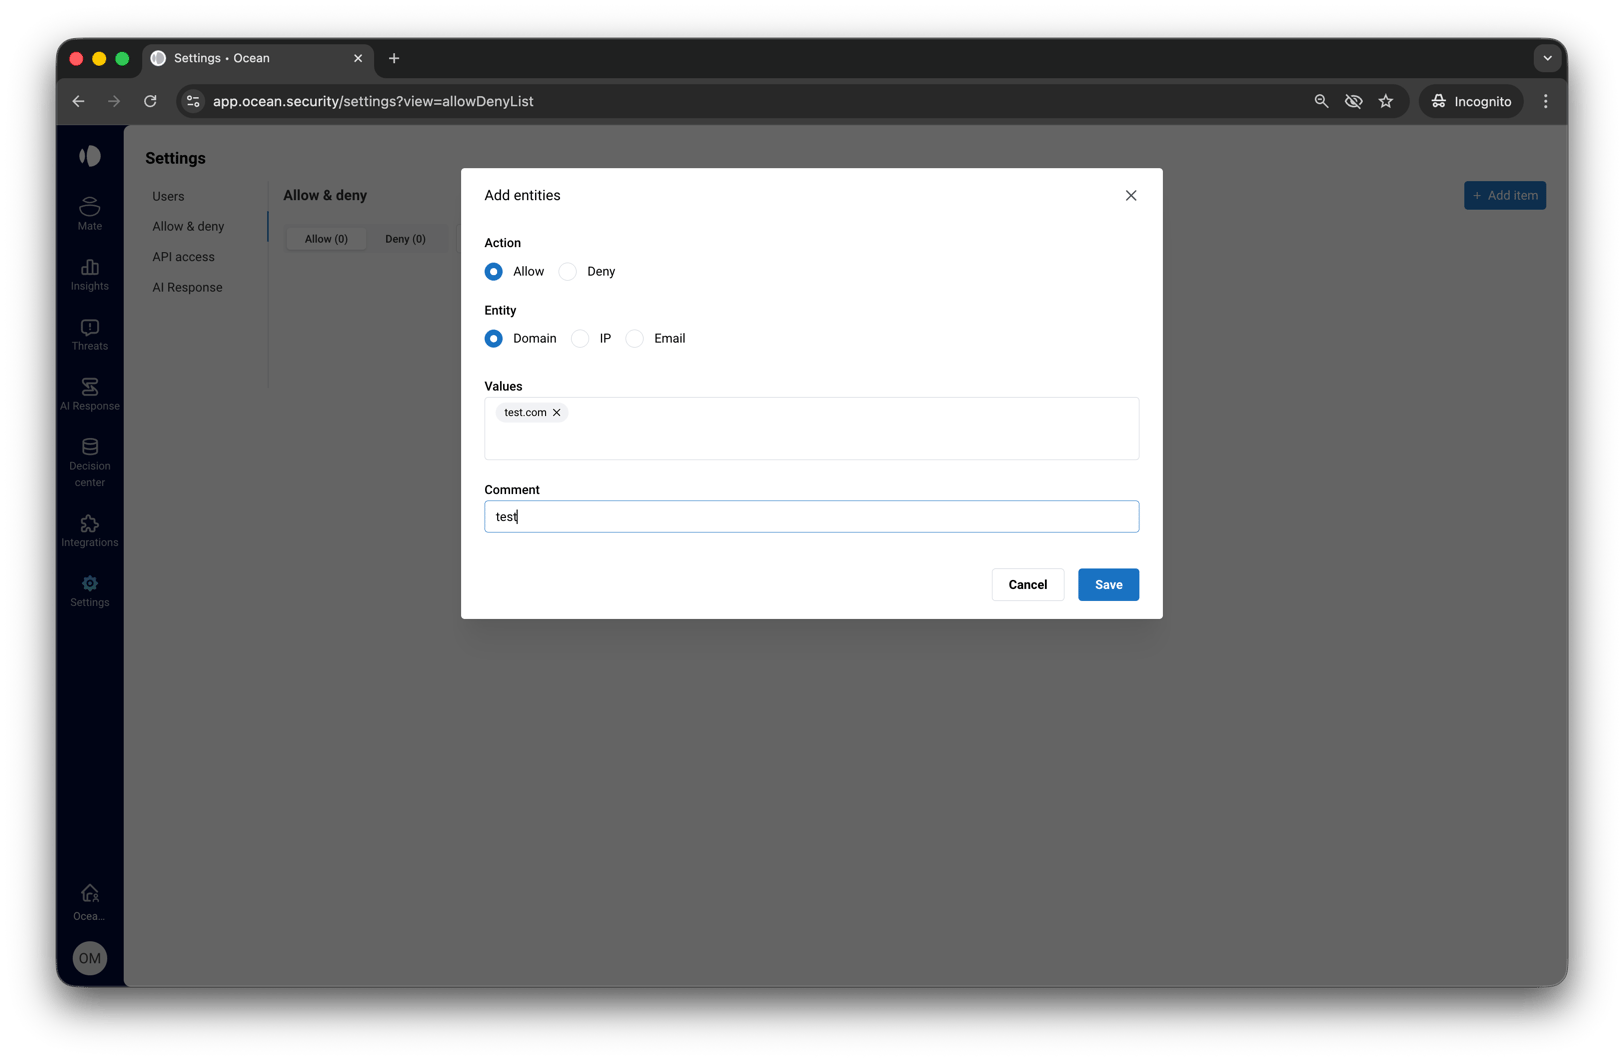
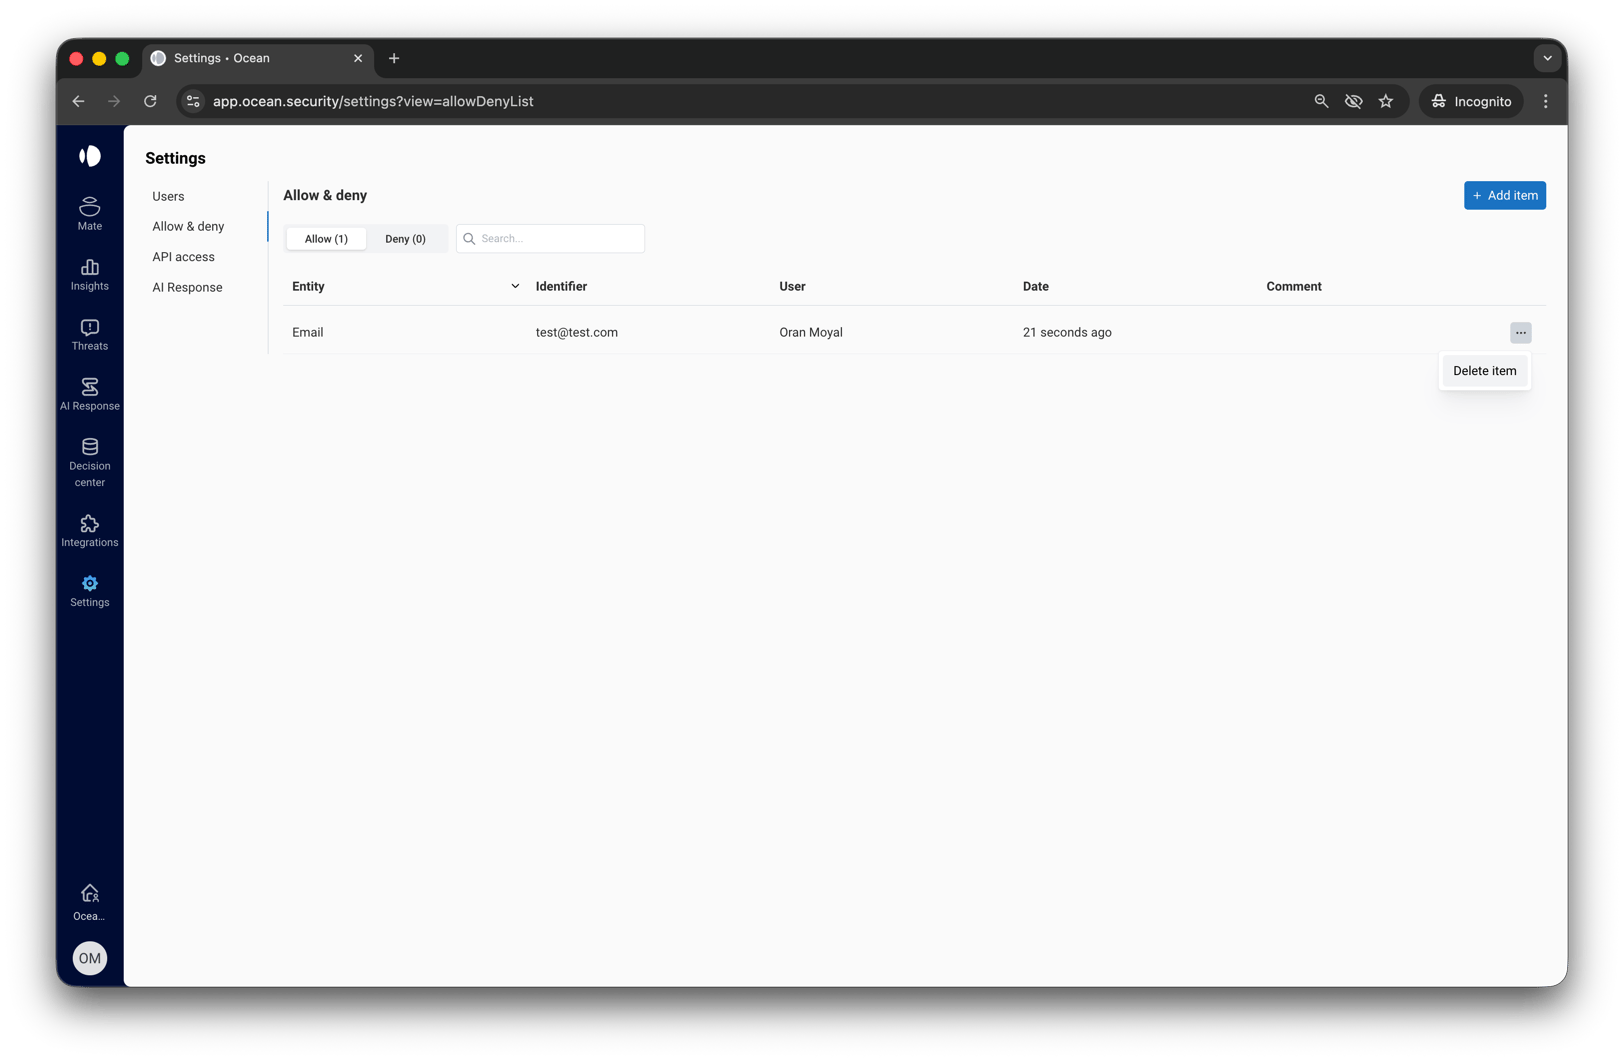
Deleting Entries
To remove an entry:- Find the entry in the list
- Click the menu icon (three dots) on the right side of the row
- Select Delete
- Confirm the deletion
Validation Rules
Ocean validates entries before adding them to ensure they are properly formatted.Domain Validation
- Must be a valid domain format (e.g.,
example.com) - Cannot contain wildcards (
*) - Must have at least two characters in the top-level domain
- Cannot be an internal domain belonging to your organization
IP Validation
- Must be a valid IPv4 or IPv6 address
- CIDR notation is supported (e.g.,
192.168.1.0/24) - Cannot be a private/internal IP address:
10.0.0.0/8172.16.0.0/12192.168.0.0/16
Email Address Validation
- Must be a valid email address format (e.g.,
user@example.com) - Must contain exactly one
@symbol - Must have a valid domain portion after the
@
Conflict Handling
Ocean prevents conflicts between Allow and Deny lists:- You cannot add the same domain, IP, or email address to both lists
- If an entry already exists in one list, you must remove it before adding it to the other list
Graymail-Scoped Rules
If graymail detection is enabled for your tenant, each allow/deny entry includes a Verdict scope field. This lets you create rules that apply only to graymail classification without affecting spam or threat detection.| Verdict scope | Behavior |
|---|---|
| Global | Default. The rule applies to all verdicts. Allow marks the email as allowed; Deny marks it as denied. |
| Graymail | The rule applies only to graymail classification. Allow = emails from this sender are never classified as graymail. Deny = emails from this sender are always classified as graymail and routed to the remediation folder. |
Graymail verdict scope does not override threat verdicts. A malicious or spam email is not reclassified as graymail even if the sender has a Graymail Deny rule.
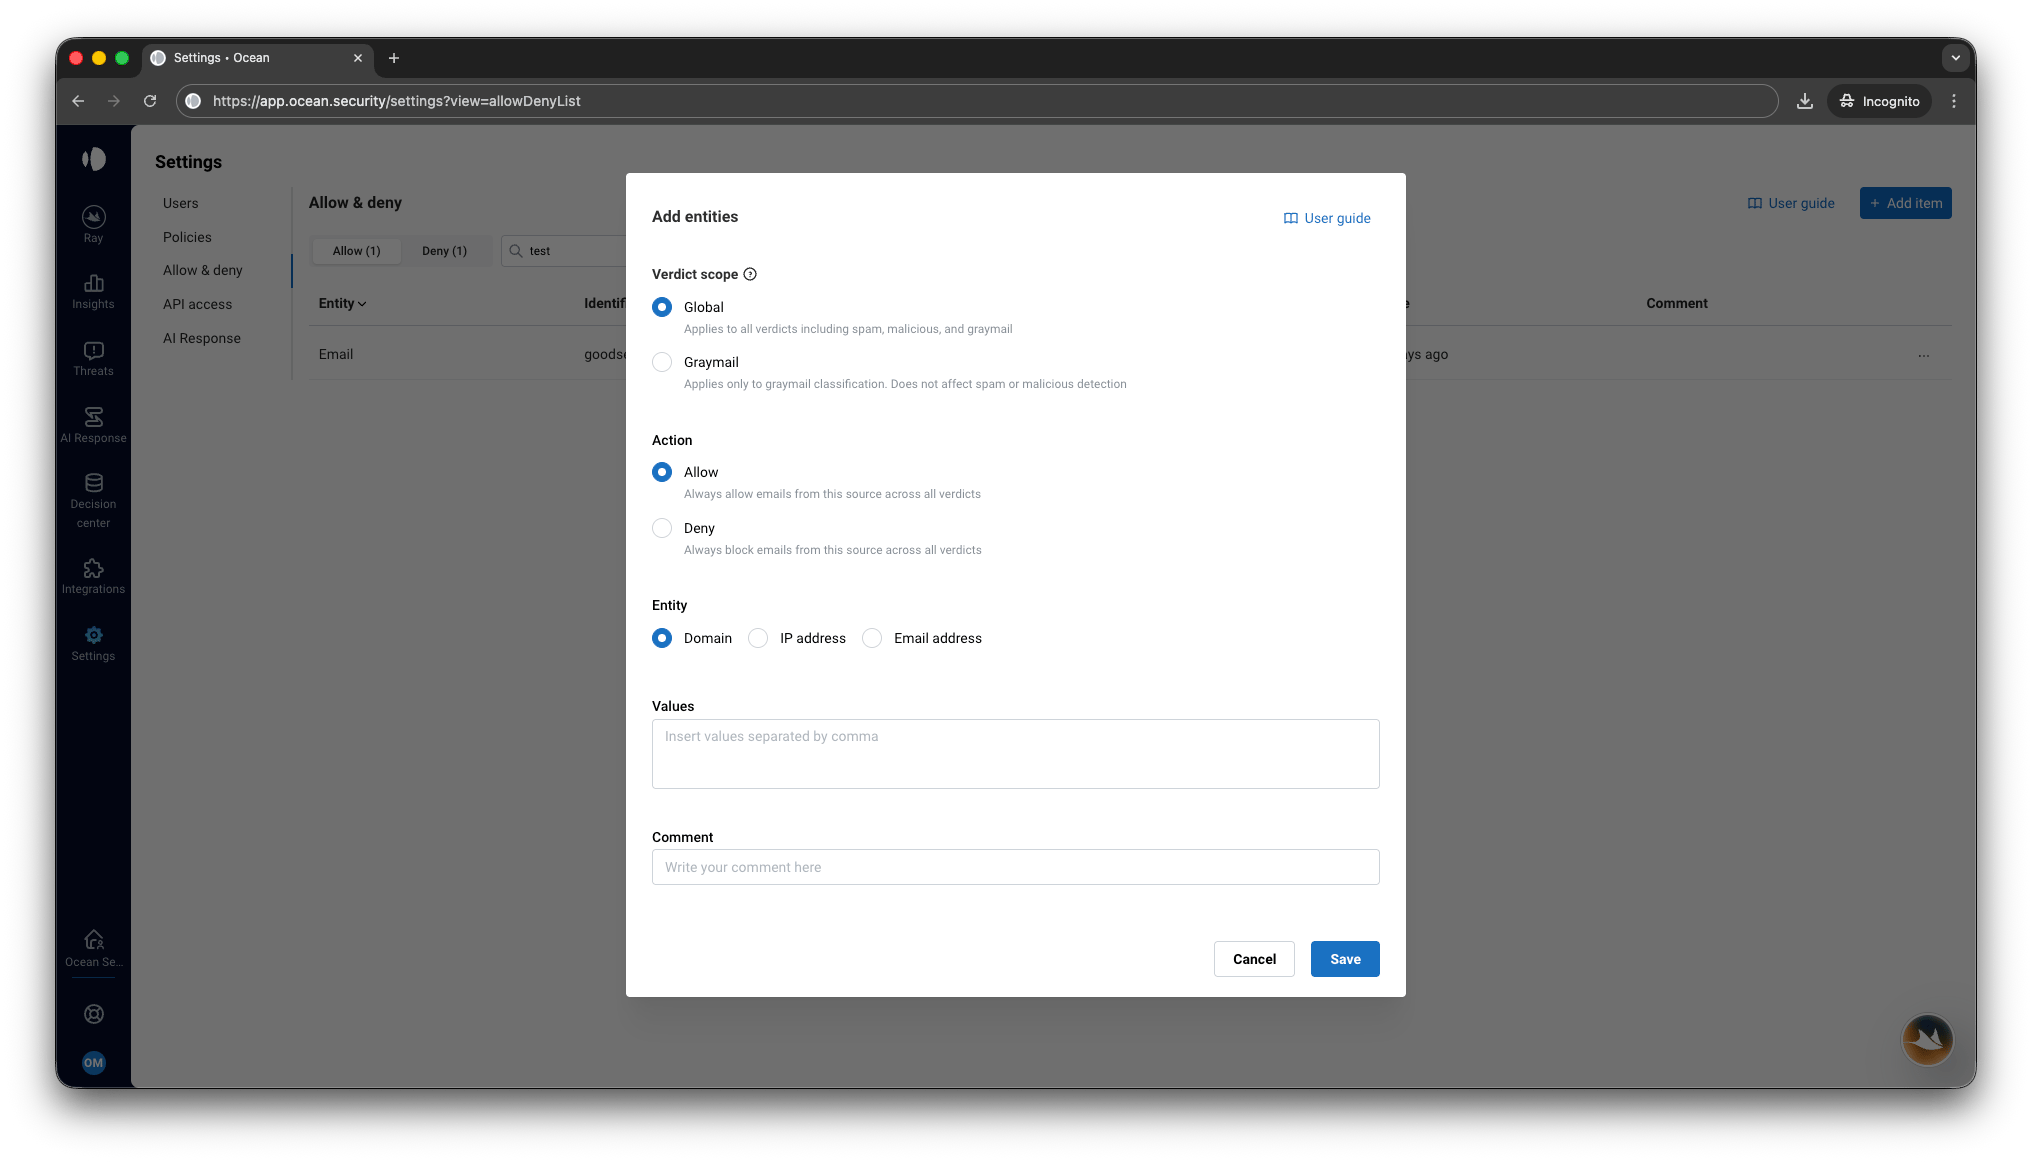
- Follow the Adding Entries steps above.
- Before saving, set Verdict scope to Graymail.
Frequently Asked Questions
How quickly do changes take effect?
How quickly do changes take effect?
Changes take effect immediately for all new incoming emails. Emails that have already been processed are not re-evaluated.
Should I use email addresses or domains?
Should I use email addresses or domains?
Use domains when you want to allow or deny all emails from a company or service. Use email addresses when you want more granular control over specific senders without affecting other users from the same domain. For example, you might allow
newsletter@marketing.com while still blocking other emails from marketing.com.What takes precedence: email address or domain rules?
What takes precedence: email address or domain rules?
Email address rules take precedence over domain rules. If you have conflicting rules (e.g., allow
support@example.com but deny example.com), the more specific email address rule will be applied.Do subdomains inherit from parent domains?
Do subdomains inherit from parent domains?
No. Adding
example.com does not automatically include mail.example.com or other subdomains. You must add each subdomain explicitly.What happens if a sender is on both lists?
What happens if a sender is on both lists?
Ocean prevents this scenario. You cannot add the same domain, IP, or email address to both the Allow and Deny lists. If you need to change a sender’s status, remove them from one list before adding to the other.
Can I export or import list entries?
Can I export or import list entries?
Currently, entries must be added through the portal interface. You can add multiple entries at once by separating them with commas.
Who can manage allow/deny lists?
Who can manage allow/deny lists?
Users with the appropriate permissions can view and edit allow/deny lists. Contact your Ocean administrator if you need access.
What is Verdict Scope?
What is Verdict Scope?
Verdict scope is available when graymail detection is enabled. It lets you create allow/deny rules that apply only to graymail classification, without affecting spam or threat verdicts. See Graymail-Scoped Rules for details.